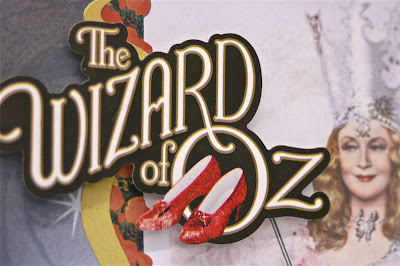
To make these great pieces of art, you'll need:
• a 6x6" artists canvas
• 1 piece of Wizard of Oz scrapbooking paper (your choice of character)
• 1 Land of Oz cardstock sticker (STCX-0099)
• circle and scallop punches (we used Marvy's 2.5" scallop and 2" circle punches)
• some pop dots
• a strip of self-adhesive rhinestones
• a bit of yellow glitter glue (we like Ranger's Stickles)
- Begin by trimming a six inch square area of your Wizard of Oz paper, in the corner where the character is primarily shown.
- Using a glue stick, apply glue liberally to the canvas and center your square of paper on the canvas.
- Trim a 1 x 6" strip from a darker area of the paper and adhere along the left edge of your canvas for contrast.
- From the Land of Oz cardstock sticker, peel off the Yellow Brick Road border and place onto your canvas, overlapping where the dark strip meets the main paper.
- At this point (if you like the distressed look) you can use sand paper or a sanding block to distress all the edges of your paper. This is the cool part, because you'll start to see the texture of the canvas come through the paper.
- Using punches, punch a 2.5" scallop from a darker section of your leftover paper, and punch a 2" circle from a lighter area.
- Adhere circles together using a glue stick, centering the smaller circle inside the larger scallop. Place one of the phrases from the cardstock sticker in the center of of your mounted circles, and glue to the canvas as shown in the image above.
- Using pop dots, adhere the Wizard of Oz title and the Ruby Slippers stickers from the cardstock sticker, placing as shown. The pop dots give the piece great dimensionality!
- Finally, place a strip of self-adhesive rhinestones below the phrase on your scalloped circles, and embellish the yellow swirls with a bit of Stickles.
These look great when displayed together, so be sure to make a few! Since we make papers for all the Wizard of Oz characters, you can pick your favorites!


No comments:
Post a Comment